
Summer Starts Here - Save up to 70%
To see if this custom-fit item will work for you please tell us what vehicle you'll use it with.


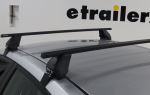
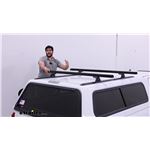
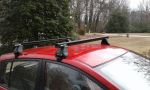
These heavy-duty, aluminum crossbars work with Rhino-Rack legs to create a sturdy roof rack. The square bars include built-in C-channels for mounting Rhino-Rack heavy-duty, contractor-grade accessories.
Features:
Rhino-Rack HD Crossbars - Black - Qty 2:Videos are provided as a guide only. Refer to manufacturer installation instructions and specs for complete information.
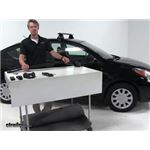
Today on our 2016 Nissan Versa we'll be doing a test fit on the Rhino Rack Vortex Aero roof rack system using part numbers RRVA118B-2 for the aero crossbars and part number RRRLKVA for the leg kit and part number DK232 for the custom fit kit for our Versa. To begin our test fit you'll notice that we've already got the front one installed. We're going to do the rear one together. Let's go ahead and start by grabbing our leg, okay Then we'll grab our pad. Now on the bottom here you'll notice that it's got this raised portion here. We want to make sure that this facing inward as you see it here.
We'll just push it in place. Okay. Once that's installed then we can install the hook. Let's go ahead and take this bolt out here. Now you also want to refer to your fit guide and make sure you have the correct hook because they are different from the front to back.
We'll set it in place and then we'll loosely install the bolt. Just like that. Okay. We can set that down. Let's go ahead and remove our end cap on our crossbar. We can actually turn it upside down.
We need to make sure that our plate here is loose so we can easily slide it on. Just like that. While we're at it we can actually go ahead and replace that end cap. Now, according to our fit guide, we'll need to be 142 millimeters from this point here to the first portion of our leg. Ordinarily, you're going to get these little plastic strips with measurements on them to help you get that, but for demonstration purposes, we're going to grab our tape here and we're going to be looking for 14.2 centimeters because that what ...
that's what it . excuse me, that's what it converts to. That's going to be right about there. It actually looks pretty close, so if that comes off just clip it back in place. Then we'll tighten that down with our included tool. It doesn't need to be extremely tight. Just enough to flatten out our little walk washer there. Okay. Now we've already got the other side set so let's go ahead and open up our rear doors. Then we'll set it in the general area, which is going to be right around here. You want to be sure and set it gently in place. All right. Then we can grab our tape and we'll refer to our fit guide and we're actually looking for 700 millimeters, but in centimeters it converts to 70 centimeters. We're going to come back . excuse me that's going to be from the center of our front cross bar to the center of the rear. We're pretty close. With that side being lined up I'm going to go ahead and line up the other. Close here. All right. That looks pretty good. Now you'll want to be sure, as I put the pad on here, that it's going to be nice and snug up against this channel here. Now if it's not, you'll need to change it around, so for this side I've actually got it on . We're going to go ahead and switch it around. Just a little mistake. Set that back in place. There. As you can see it's going to fit just inside the channel. Just like that. Make sure that measurement's right real quick and then we can go ahead and tighten them down. All right. Good. We'll grab our included tool and we want to tighten it down just enough to where it makes contact first and that goes for both sides. You don't want to start tightening down too much because it'll pull the whole crossbar to one side. That's not what we want. Do the same thing over here. Since we know that that side is already making contact we can go ahead and give this a few more turns and start tightening it up. Now it's a good idea to alternate. We want our tool here that's got a little arch in it, we want it to be straight when we tighten it and that's how we know we've got the correct torque on it. Be sure to do that for both sides. All right. Then we can put on our locking covers. These are just going to clip in like so. All right. Now before we finish up here the front installs very similar. We followed our fit guide. We started from our fixed point and we went forward. Got the center here and then to get the back we measured from center of the crossbar and that's how we got it. It's a very easy installation. You want to be sure to lock up your end caps and then you're all set. That's going to complete our test fit on the Rhino Rack Vortex Aero roof rack system on our 2016 Nissan Versa.
Average Customer Rating: 4.5 out of 5 stars (66 Customer Reviews)
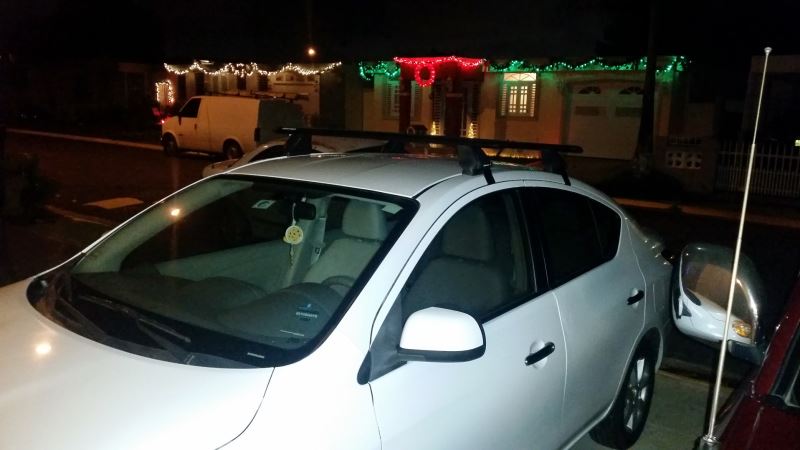
These heavy-duty, aluminum crossbars work with Rhino-Rack legs to create a sturdy roof rack. The square bars include built-in C-channels for mounting Rhino-Rack heavy-duty, contractor-grade accessories.I got the roof rack mounted anyways. Better pics to come when it's all finished!
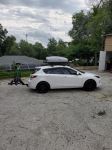
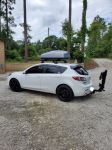
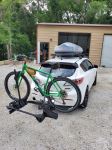
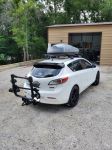
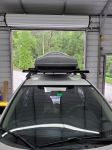
Thanks to etrailer, I am ready to do some serious summer exploring with my 2013 Mazda 3! Rhino Racks, Malone top box, and Kuat bike rack!

The rack fit well and was easy to install. Seems to be made well. The problem is the amount of road noise. I never even put the basket on. It was so loud, it roared. I repositioned it several times but the noise was way too much and I finally just removed it. I spent a lot of money for the rack and the basket and now they are in storage. I wish it would have worked out better because I thought it looked really good.
love it, no problem and easy to install and take on and off, 47,000 miles on the highway and not a single issue. I even like the song the ladder hums to me driving down the interstate. This is my second Rhino and both have preformed to a high standard.
Ordered a Rhino Rack for my 2014 GMC Sierra 2500HD Denali. Rack arrived in very good shape and all items were there. Installing at this time and see no problems ahead.
The boxes were delivered quickly and promptly (earlier than expected). The instructions were easy to follow. I just needed the space to lay everything out and to match the numbers to the correct items. My only issue was that the specs for my 2016 Nissan Versa Note SV asked for 144mm for the front, but in fact, it needed to be 148mm. The rear asked for 142mm, but it needed to be 144.5mm. Once I figured that out, the rest was straight forward. The crossbars are super sturdy and the rubberized top is a nice add to keep things from slipping. Thank you!
I plan on installing a V-boat rack on the car rack. I can't wait to transport canoes!
Good quality and locks are included. The plastic lock covers are flimsy but they will keep an honest person honest.
Excellent product, easy to install and looks great on my Nissan Versa!
Things went well. Customer service was great.
I got the roof rack mounted anyways. Better pics to come when it's all finished!
This kit is easy to slap on and sturdy enough to balance my skis and snowboards. I recently used the Rhino Rack on a three hour drive to a ski resort and had no issues.
Perfect fit and quick delivery!
This rack works perfectly on my Nissan Versa for carrying my two Perception Sound 9'6" kayaks. The Rhino-Racks look good to me. The kayaks can rest directly on the rubber pads on the rails, unlike the Yakama racks I had in the past that had bare pipe rails. Also, I expect I can buy parts to adapt this product to a different car without having to buy new towers. I am sorry there are not hooks or loops to attach bungees when carrying lumber. They are noisy in the wind, but less so when carrying the kayaks.
This is my second Rhino-Rack. They go on very easily and hold the bikes/kayaks and even an extension ladder very well....thanks for a great product
Two items I received surprised me when I unpacked the box were the rails because they were not black like I saw in the picture, and the rubber insert that I am having a hard time sliding in the rail. Should this rubber insert have come already installed in the rail or is there a top on how to put in with ease?
Works as described! The instructions were pretty good once I deciphered the different parts that were described on the instructions. Installation wasn't bad. It took me about 2hrs. The most difficult part was making sure the anchoring kit aligned with the bars. I cut everything according per the instructions but the measurements on the instructions were off by a few millimeters. And so, i had to remove and relocate everything a few times until everything was perfectly aligned. I used the roof rack to load my kayak the other day and it held up really well! Two thumbs up!
Fast service and was everything I expec ted
Thanks to Etrailer, I am ready to do some serious summer exploring with my 2013 Mazda 3! Rhino Racks, Malone top box, and Kuat bike rack!
Well engineered rack that fits my Ram 2500 crew cab well. A bit of wind noise at highway speeds. I have the heavy duty cross pieces with a square cross section.
Great product everything fit perfectly. With the heavy duty bars almost all the hardware for anything you put on the rack is too short
Needed the Rhino-Rack parts and they were delivered when promised. Great service.
Once installed they seem sturdy and look good. One of the end caps was damaged in shipping but otherwise everything was good
Thank you for the very speedy customer service! My roof rack is already here!
Found Package was broken after delivered, and missing 2 end cap
Do you have a question about this Roof Rack?
Info for this part was:
At etrailer.com we provide the best information available about the products we sell. We take the quality of our information seriously so that you can get the right part the first time. Let us know if anything is missing or if you have any questions.


Thank you! Your comment has been submitted successfully. You should be able to view your question/comment here within a few days.
Error submitting comment. Please try again momentarily.